You can now grade Classic Cadmus assessments with Cadmus Marker. This marking tool enables educators to create rubrics, mark submissions based on the rubric, add specific comments to selected text, and provide overall feedback on submissions.
In this article, we cover:
Adding rubrics to Classic Cadmus
- Launch Cadmus using the (external tool) link from within your LMS
- Select Classic Cadmus as the format of your assessment.
- Click Set requirements, grading options and settings. Under the Marking + Feedback section, select Cadmus Marker and add the total marks in the Max Points column.

- After confirming the settings, create your assessment instructions.
- In the Rubric section on the left, click Create a Rubric.

- Click Create Rubric. You will have two options: Create from scratch or Re-use past rubrics. Select the appropriate option and click Confirm.

- When creating a rubric from scratch, click on the Rubric Format button to switch between actual points, absolute points, and weighted percentages and change the order of scale items - ascending left to right or descending left to right. You can also toggle between list and grid views when setting up the rubric.
In case of actual points, type in the total points under each criterion, and then add the ranges for the individual scales under that criterion. In the case of absolute points, individual scales under a criterion can have only whole-number values. For weighted percentages, type the % value each criterion contributes to the final total in the Weightage column, then add the ranges for the individual scales under that criterion.


- You can reuse rubric criteria used in previous assessments by clicking on the dropdown and selecting from available criteria or searching for a particular criterion. To add a new criterion, type it in the search bar and click the Add button. Add more information about the criteria by clicking on the description. After adding a criterion, hover over it to view the name of the entire criterion.

- Scales can be either reused or created from scratch. To add scales from previously used rubrics, click the Re-use scale button. To add new scales, click the Build your own scale button. Click on the Add New Criteria button to add more scales or click Duplicate Last to duplicate the criteria from the previous row. Add all criteria, scales, weighting, and descriptors to complete the rubric. You can then save the rubric.

- After saving the rubric, you’ll return to the task builder. Click Edit Rubric to make changes to the saved rubric. Click Remove to delete the added rubric.
- When reusing rubrics, select a previously used rubric from the list. If all criteria and scales are acceptable, click Use rubric. If not, you can edit the rubric and save it for grading. Click Preview to view how the rubric appears to students. Click on Download PDF to export an offline copy of the rubric.
NOTE: When there's a mismatch between the Max Points added in the settings and the points total from rubrics, the total marks inputted in the Max Points column will be considered final. The marks from rubrics will be scaled up or down to give a final score out of the max points.
Grading Classic Cadmus assessments with a Rubric
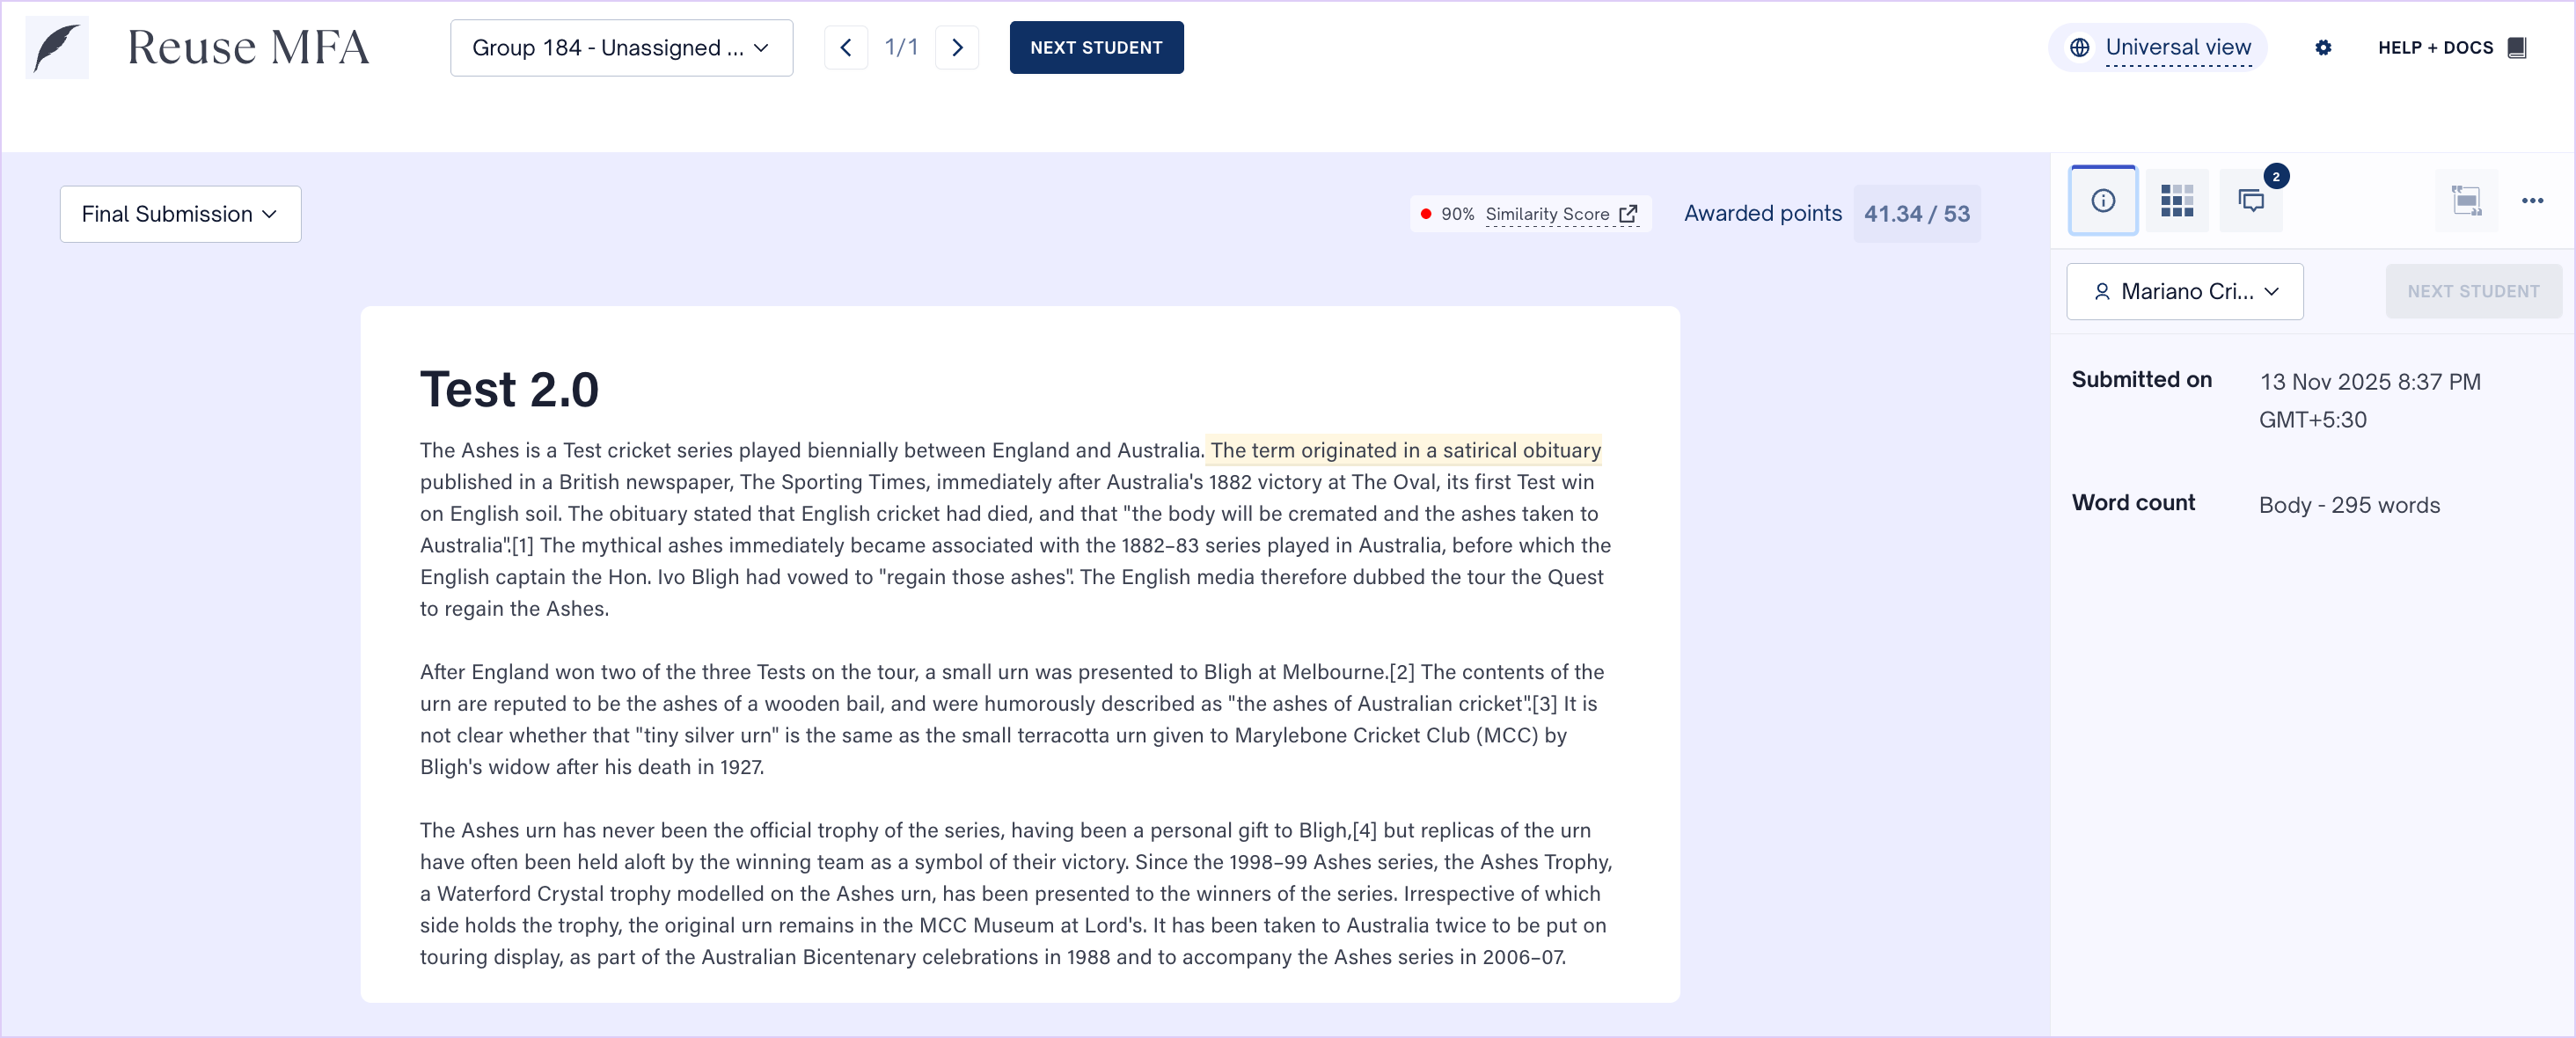
- After submissions are made, navigate to the Marking tab and click Mark.
- This will take you to the Marking view, where the student's name is displayed at the top. Use the navigation arrows or the Next Student button to switch between submissions. Click the dropdown to search for specific student submissions.
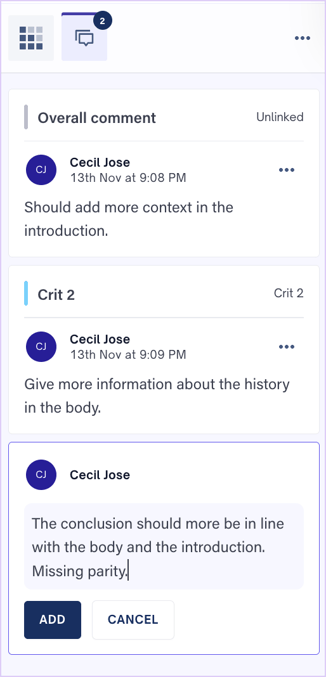
- The Marking and Feedback tabs are in the right panel. The Information, Marking, and Feedback tabs are in the right panel. In the Information tab, you can find key submission-level information such as the submission time, word count, special considerations (if applicable), and added tags.
- The Marking tab displays the marking criteria according to the rubric. You can click the scale buttons to automatically calculate marks based on the weighting percentages, absolute, or actual points. Custom marks (even decimal points) can be added in the criterion mark and the awarded points boxes. If there are unmarked criteria, an indicator at the top will show how many criteria remain unmarked.
- In the Feedback tab, you can add feedback comments. Annotated comments can be added by selecting a portion of the work. Clicking the highlight would select the linked comment and vice versa. Click ••• on the comment box to edit, link, or unlink a comment to a specific criterion from the rubric.

-
Click ••• at the top right of the panel to find options to view or open the rubric in an expanded window. When you view the rubric while marking, you can click on the lock icon 🔒 next to the furthest criteria to unlock and update it. Note that updating a rubric after marking has begun would require re-marking the students who have already been graded. Click Proceed, then make edits to the rubric as needed.
When the expanded view rubric is open, the right-hand side rubric panel will not be available. Click on the Return Rubric to Side Panel button to continue grading from the right-hand side rubric panel.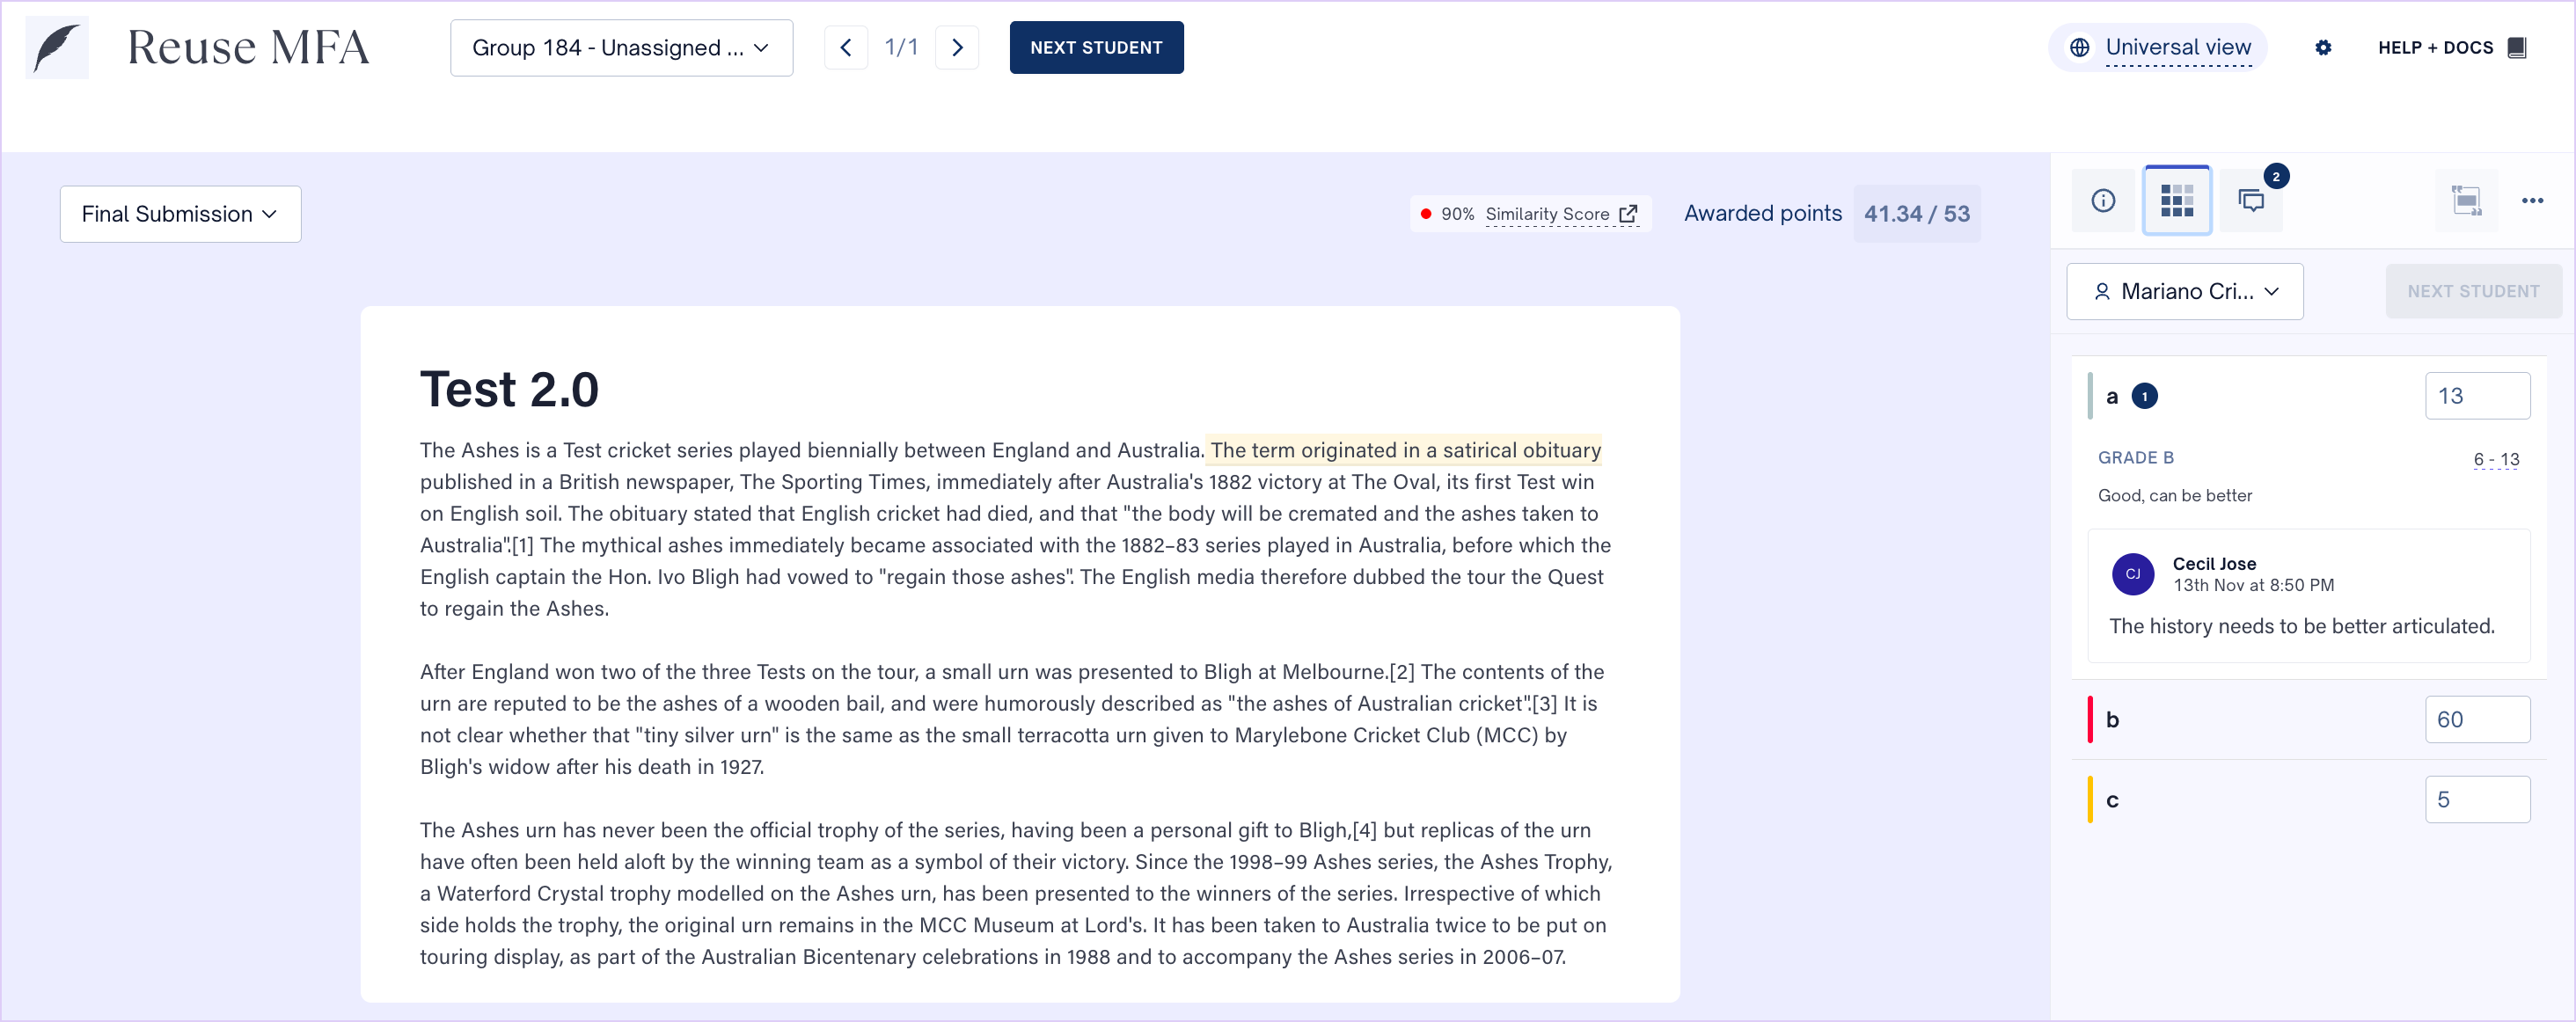
NOTE: The comments have an autosave feature. To save any feedback comment, click outside the comment box. After making edits to a comment, click anywhere else to save.